Thursday, September 25, 2014

How to make a felt board

Felt boards are great tools to engage children in learning.
Felt sticks to felt.
Using the board, I've designed a bunch of learning games for the children I take care of.

I have opened up an Etsy Shop that can be found here: https://www.etsy.com/shop/AFCShop

Felt Boards are a way for kids to use their creativity while being hands on.
It can help teach color, patterns, math, matching, sorting, etc.
As well as just being a tool for imaginative play.

What do you need to make a felt board? 
1. A board
2. Hot glue gun
3. Felt

Board types: 
I like to use canvases. They are light but sturdy. At an art supply store, you can get a 16 x 20 in. canvas for under $10.
Other suggestions:
Cork boards
White board
*** A great place to look for an inexpensive board is a thrift store, Salvation Army or Goodwill
*** Most inexpensive option: foam core board 
Foam core board can be found at Staples, Target, Wal-Mart, the pharmacy
If you want to get creative, you can get an old picture frame, pop the glass out, cover the back plate with felt and put it back in the frame.

Felt: 
Felt runs about $4.99 a yard. (It's often on sale for 40% off at Jo-Ann Fabrics)
Depending on the size of the board you cover, you should only need a 1/2 yard (18 x 45 in)
I recommend using grey, off white, light blue, or camel color for the background.

Making the Felt Board on Foam Core: 
- Cut the board to the size you desire. I recommend 16 x 20 inches or larger.
- Lay the felt out on a table. 
- Measure an inch wider than the board and cut out felt. 

- Using scissors make a cut like this at each corner.
Excuse my horrible drawing...
It'll look like this.
- Glue the sides that have the rectangular edge to the board 1st.
- Glue the sides that have the angled edge, next.

Only squeeze 2 inches of glue out at a time as you go or the glue will dry before you can stick the felt to it.


That's it! You're done! 

_______________________________________________________________________________

This is a felt board I made by covering a canvas (16 x 20 in) 

Lay the canvas face down on the felt. Measure 1 1/2 in. around the canvas and mark the corners of the canvas with a pencil. (of course you could measure the felt to be 1 1/2 inches wider than the canvas but, for me, it is easier to cut a straight line by using the edge of the canvas as a guide) 


Cut the felt to be 1 1/2 inch wider than the canvas. 

Using a hot glue gun, glue the felt to the wooden frame of the canvas on the long side of the canvas.
Only glue 2 inches at a time as you go along the edge or the hot glue will dry before you can stick the felt to it. 

The next part doesn't have to be exact. 


If you're not fussy- just use the method from the foam core board.

I am really particular about the way the corners look but my method for making the edges doesn't make a lot of sense when I write it out.
I made a cut at each edge of the canvas, the height and the end of the board. I cut off a small rectangle that was over hang so I had a small strip that was the height of the canvas and glued it to the board like the photo above.
I did the same to the other side and then glued the rest of the felt to the frame.


These boards are 16 x 20 inches.


Boards and games are sold here: https://www.etsy.com/shop/AFCShop

Thursday, September 11, 2014

San Tokki (Children's song)

I have been teaching myself Korean and the kids have been learning along with me.
This is a Korean Children's song.

San Tokki with Rabbit

Ages: Ageless!!!!!!!!!!!

Supplies: 
Cardstock
Permanent marker
Tape
Scissors

Benefits: Puppet play, other language, music


Activity: 
Draw a rabbit on a piece of cardstock with permanent marker.
The child can color the rabbit in.


Cut it out.
For a handle, cut a piece of cardstock in half "hamburger wise" and then fold it over about an inch width over and over then apply tape.
Tape the bunny to the handle.


Song: 
San tokki, tokki-a                              Mountain bunny, bunny
Uh-di reul ga neu nya                         Where are you going? 
Ka jong Ka jong dwee myun suh        Bouncing Bouncing as you run
Uh-di reul ga neu nya                          Where are you going? 


산토끼 토끼야
어디를 가느냐
깡충깡충 뛰면서
어디를 가느냐

Sing the song and have the child sing with you while you use your rabbit puppets.
I sing it in english and Korean.


Tuesday, August 19, 2014

Adhesive Card Stock= Sticker Anything

Match My Picture

Ages: 2 years - 4 years

Supplies: 
Scissors
Card stock
Adhesive cardstock
*If you can't find adhesive card stock use glue.

Benefits: Matching, shapes, order of operations

I got this from JoAnn's it's $9.99 and was 40% off (Size 4.5x6.5)


Activity: 

Prep:

  1. Cut out pieces to make a scene. Cut 2 of each piece. 
  2. Fold a piece of card stock in half  "hot dog" wise and cut along the line. 
  3. Draw a line down the middle. 
  4. Adhere 1 copy of the scene to one side of the paper 
Play: 
Give the pieces to the child and have them match your picture. 

Sunday, August 17, 2014

Scribble Art

Scribble Art 

Ages: 2 years to ?? I do this with my friends sometimes.

Supplies: 
Paper
Marker/ crayon/ colored pencil (you choose)

Benefits: Imaginative play

A man with 3 eyes. I was black pen. He was green crayon. (Age 3)


Activity: 

The child draws or scribbles a picture.

You ask them what it is.

Then, with their permission, you draw on top of it to bring out the details they describe.

**Make sure that the child agrees to coloring together so you don't make them feel like what they drew doesn't look like what they say it is.

With older kids (ages 4+), we take turns scribbling with no intention what it is and then sit back and look at the scribble and see what stands out to us, the same way you gaze at clouds. We also take turns drawing the details we describe.

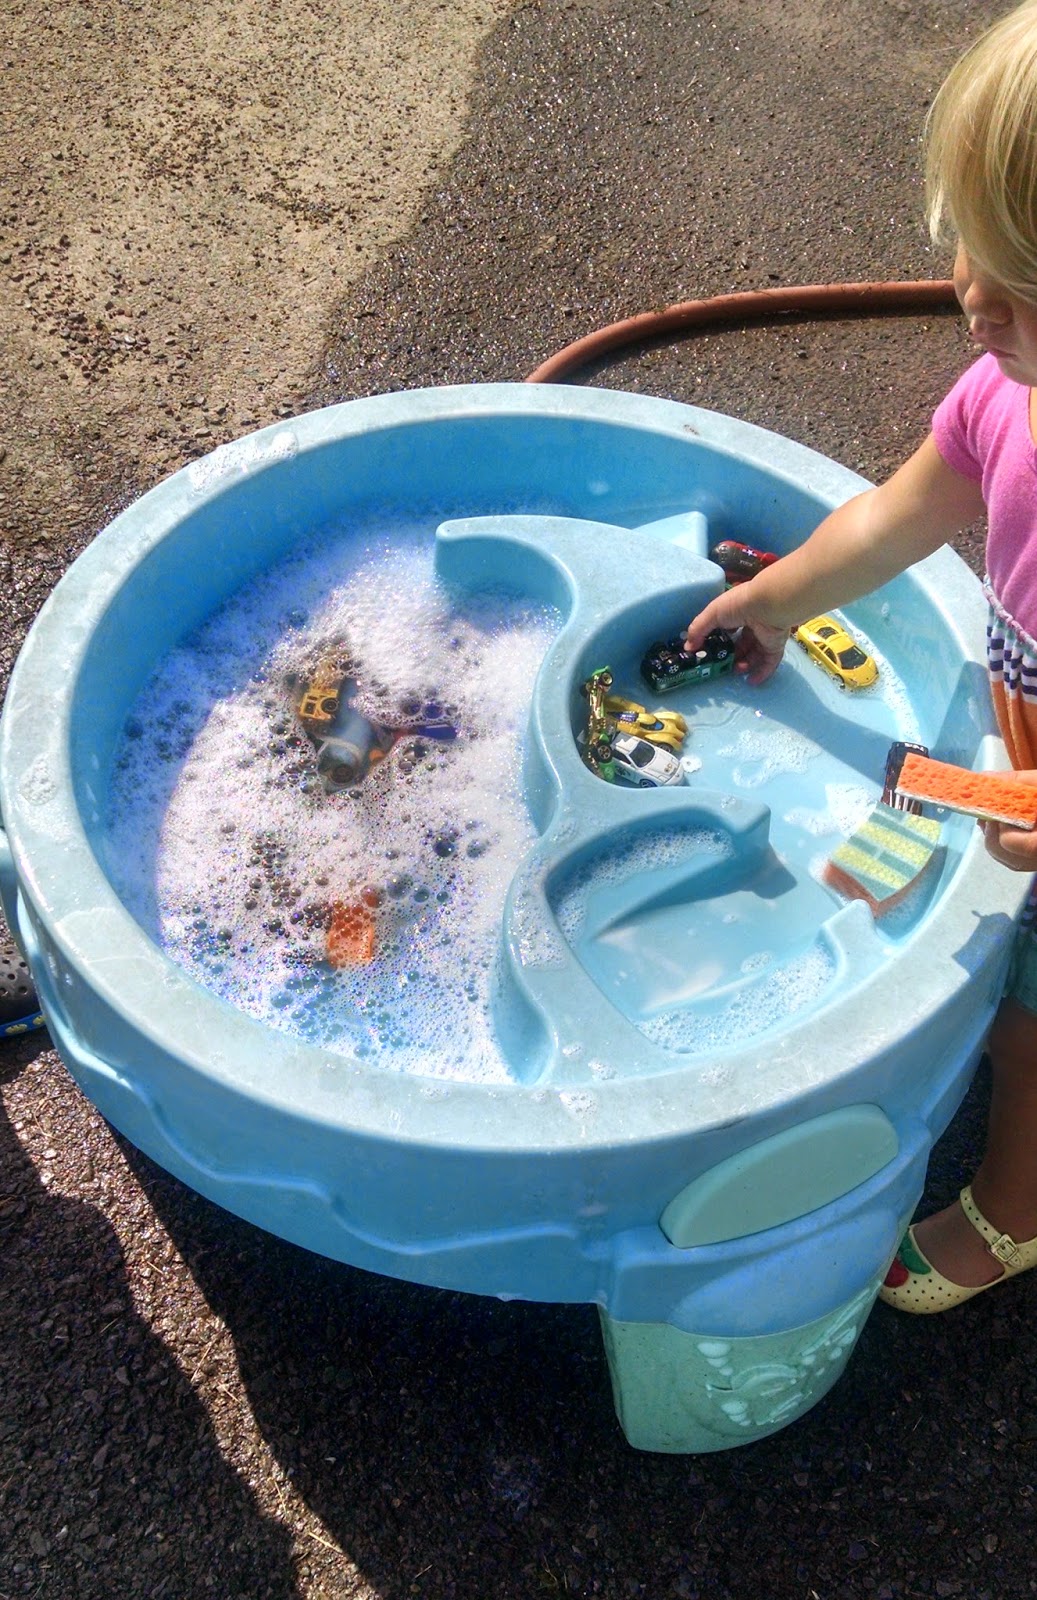
Dirt Table/ Car Wash

Dirt Table/ Car Wash

Ages: 18 months-5 years

Supplies: 
Match Box Cars
Dish Soap
Water
Water table or 3 plastic boxes/ buckets/containers
Rubbermaid lid
Sponge cut in half or old wash cloths or paper towels
Dirt 

Benefits: order of operations and tactile play 


Activity: 

Set Up: 
1. Dig up a small patch of dirt and put a few scoops on the rubber maid lid. Add water to make it mud. 
2. Fill 3 plastic containers with water. Add dish soap to one. 

Play: 
Let the kids drive the cars through the dirt. 
When they're ready to play car wash, dip the car in a container with just water. 
Next put the car in the soapy water. 
Use sponges and wash cloths to clean the cars. 
Then put the cars in the 3rd container to rinse off the soap. 
Then line then up to dry or use a dry towel to dry the cars. 

Modifications: 
  • Build an obstacle course for the cars on the dirt table. 
  • Make a parking lot using sidewalk chalk 
  • Make roads on the dirt table. 

Thursday, July 31, 2014

Race Track

Cereal Box Race Track 

Ages: All ages.

Supplies: 
Cereal box
Tape
Scissors
Toy Cars
Painter's tape

Benefits: ...It's fun?


Activity: 

  1. Take an old cereal box. 
  2. Open the box up on one side. 
  3. Cut off flaps on the top and bottom (set aside flaps) 
  4. Cut the box in half "hamburger" ways, which means across the middle. 
  5. Tape the 2 sides together. 
  6. Bend the edges slightly to give the cars a little bumper. 
  7. Turn the track over. Reinforce any folds in the box by taping the flaps over the folds to prevent them from bending backwards. (You can also use popsicle sticks or heavier cardboard if the box tops aren't strong enough.) 
  8. Tape the ramp to a chair and the floor using painter's tape (it won't ruin your furniture or floor when it comes up.) 
  9. Send cars shooting down the hill. 


Modifications: 
  • Make a longer track. 
  • Make 2 tracks so you can race cars or tape straws down the middle to make 2 racetracks.
  • Make obstacles for the car to go through after it comes down the ramp. 
  • Time the cars to see which car is the fastest. 


Counting Cutouts

Counting Cutouts

Ages: 18 months- 5 years old

Supplies:
Glue stick
Scissors
Card stock
Marker/ pen
Googly eyes (optional)

Benefits: Hand/ eye coordination, counting, colors, animals.


Activity: 

Choose a theme: farm animals, under the sea creatures, shapes, types of transportation, fruits or veggies. 
Choose 5 different types of things from that category and give each thing a number. Example from above: 1 fish, 2 turtles, 3 crabs, 4 starfish, 5 shells. 
Cut out the number of objects associated with that number.

With the child, glue each piece to the paper starting with 1 and going up to 5. Mix up the pieces and have the kids pick out the shapes to encourage sorting, matching, and counting.
Draw faces and stick googly eyes to the animals.

Hang it on the fridge or in their room, and you can use this as a teaching tool in the future.

Modifications: 

  • Ideas for categories: Fruit: apple, oranges, grapes, strawberries, lemons.                                                                            Transportation: bus, car, airplane, truck, boat                                                                                      Shapes: circle, square, rectangle, triangle, heart                                                                                  Farm: cat, bunny, duck, dog, chicken 
  • If they are too small to glue the pieces on, have them hand them to you and they can watch you glue the pieces on the paper.